Getting Started with Google Gemini CLI
Table of Contents
Google recently released their own entry into the agentic CLI arena: Gemini CLI. What might set it apart from OpenAI’s Codex CLI and Anthropic’s Claude Code is Gemini’s large context window and support for multimodal input.
I’ve started testing it out to see just how it compares to Codex CLI and Claude Code (the latter of which I’ve been using regularly). This is where I started…
What You Can Do with Gemini CLI #
With Gemini CLI you can:
- Query and edit large codebases within Gemini’s 1M token context window
- Generate new applications from PDFs, sketches, or other multimodal inputs
- Automate tasks like querying pull requests or handling complex rebases
- Connect to MCP (Model Context Protocol) servers for extended capabilities
- Use Google Search for grounding queries with real-time information
Key Features #
Large Context Window #
Gemini’s 1M token context window means you can work with substantial codebases without losing context. This is useful for:
- Refactoring across multiple files
- Understanding complex system architectures
- Maintaining context during long conversations
Multimodal Input #
The CLI can work with:
- Text and code
- Images and sketches
- PDFs and documents
This means you can generate applications from UI mockups or process documentation images.
MCP Server Integration #
Like Claude Code, Gemini CLI supports Model Context Protocol (MCP) servers for extending functionality. The CLI includes an /mcp command for managing MCP servers, though the setup process isn’t well documented yet.
Built-in Google Search #
Queries can be grounded with real-time Google Search results, ensuring your AI interactions have access to current information.
Installation #
The Gemini CLI requires Node.js version 18 or higher. Once you have that prerequisite, you have two installation options:
Option 1: Run Directly with NPX #
npx https://github.com/google-gemini/gemini-cli
This downloads and runs the CLI fresh each time, which is useful for trying out the latest version without installing it permanently.
Option 2: Global Installation (Recommended) #
npm install -g @google/gemini-cli
gemini
The global installation gives you a permanent gemini command available from any directory. This is more convenient for regular use. The installation downloaded 431 packages and took about 16 seconds on my machine.
First Run and Authentication #
When you first run the Gemini CLI, you’ll be greeted with a setup process that configures both the visual appearance and authentication. Here’s what actually happens:
Theme Selection #
The first prompt asks you to choose a colour theme for the interface:
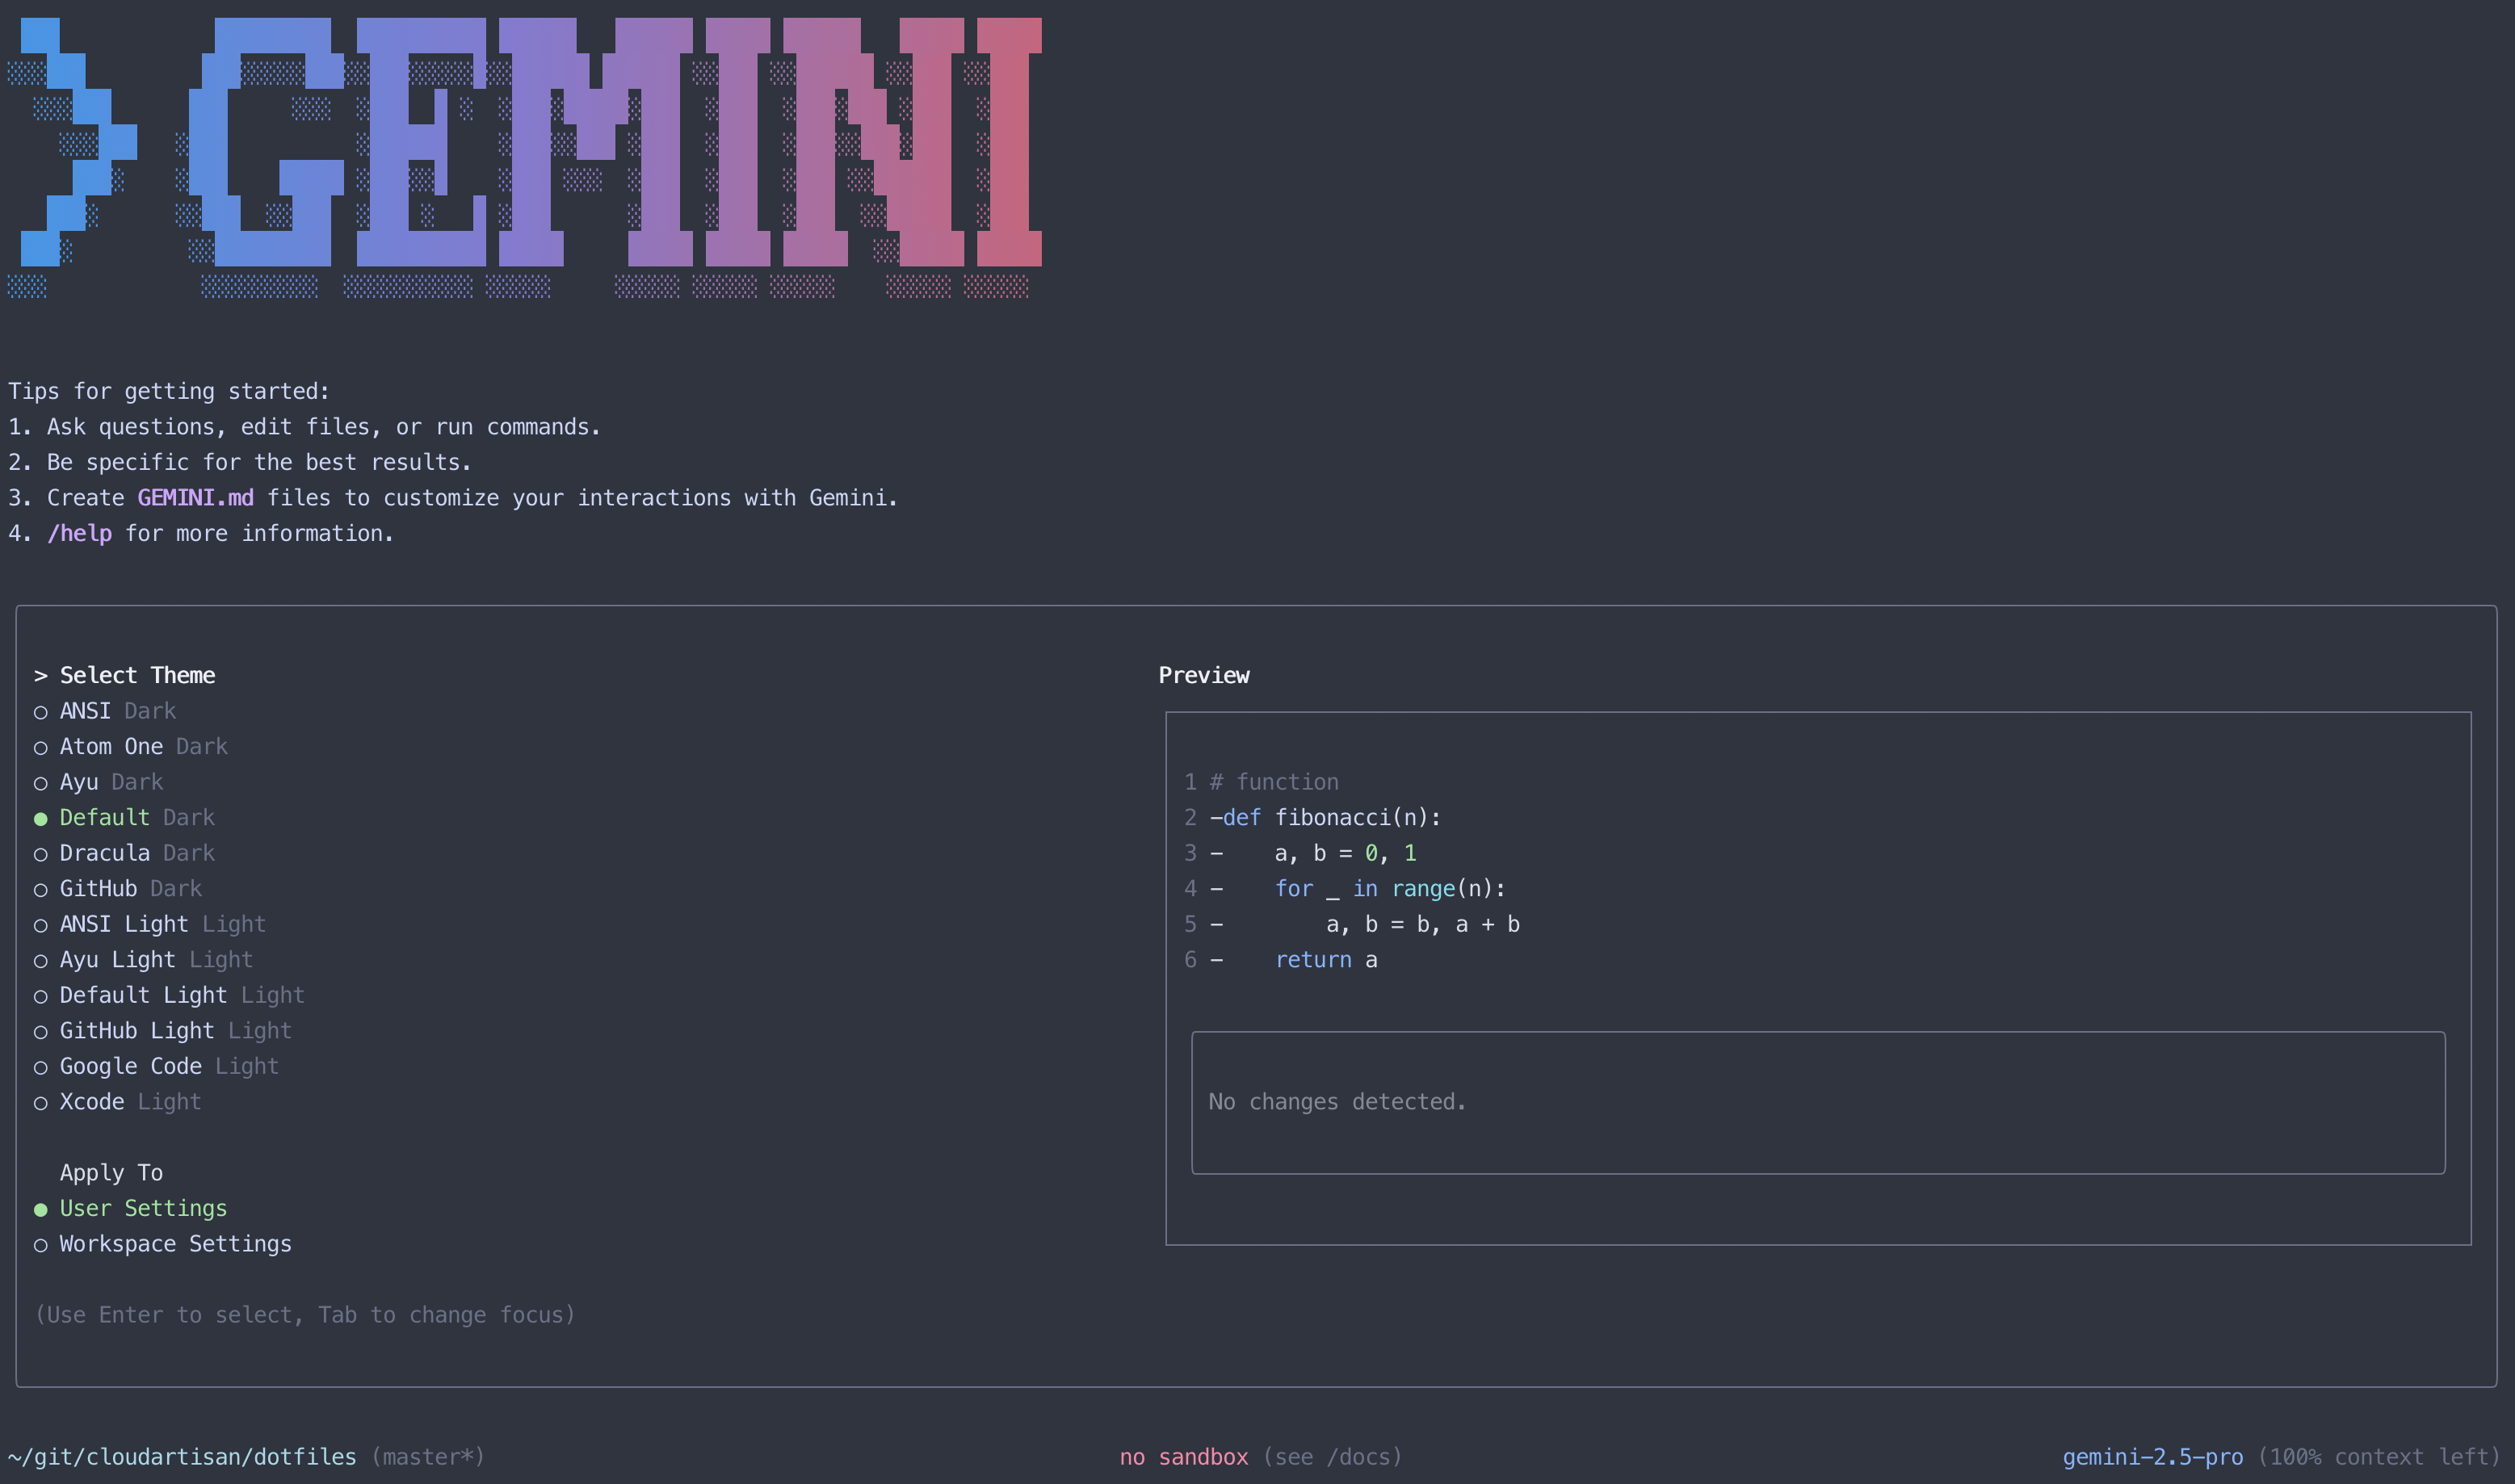
You can select from several predefined themes or stick with the default. This affects the visual styling of the CLI interface.
Authentication Options #
Next, you’ll be prompted to choose your authentication method:
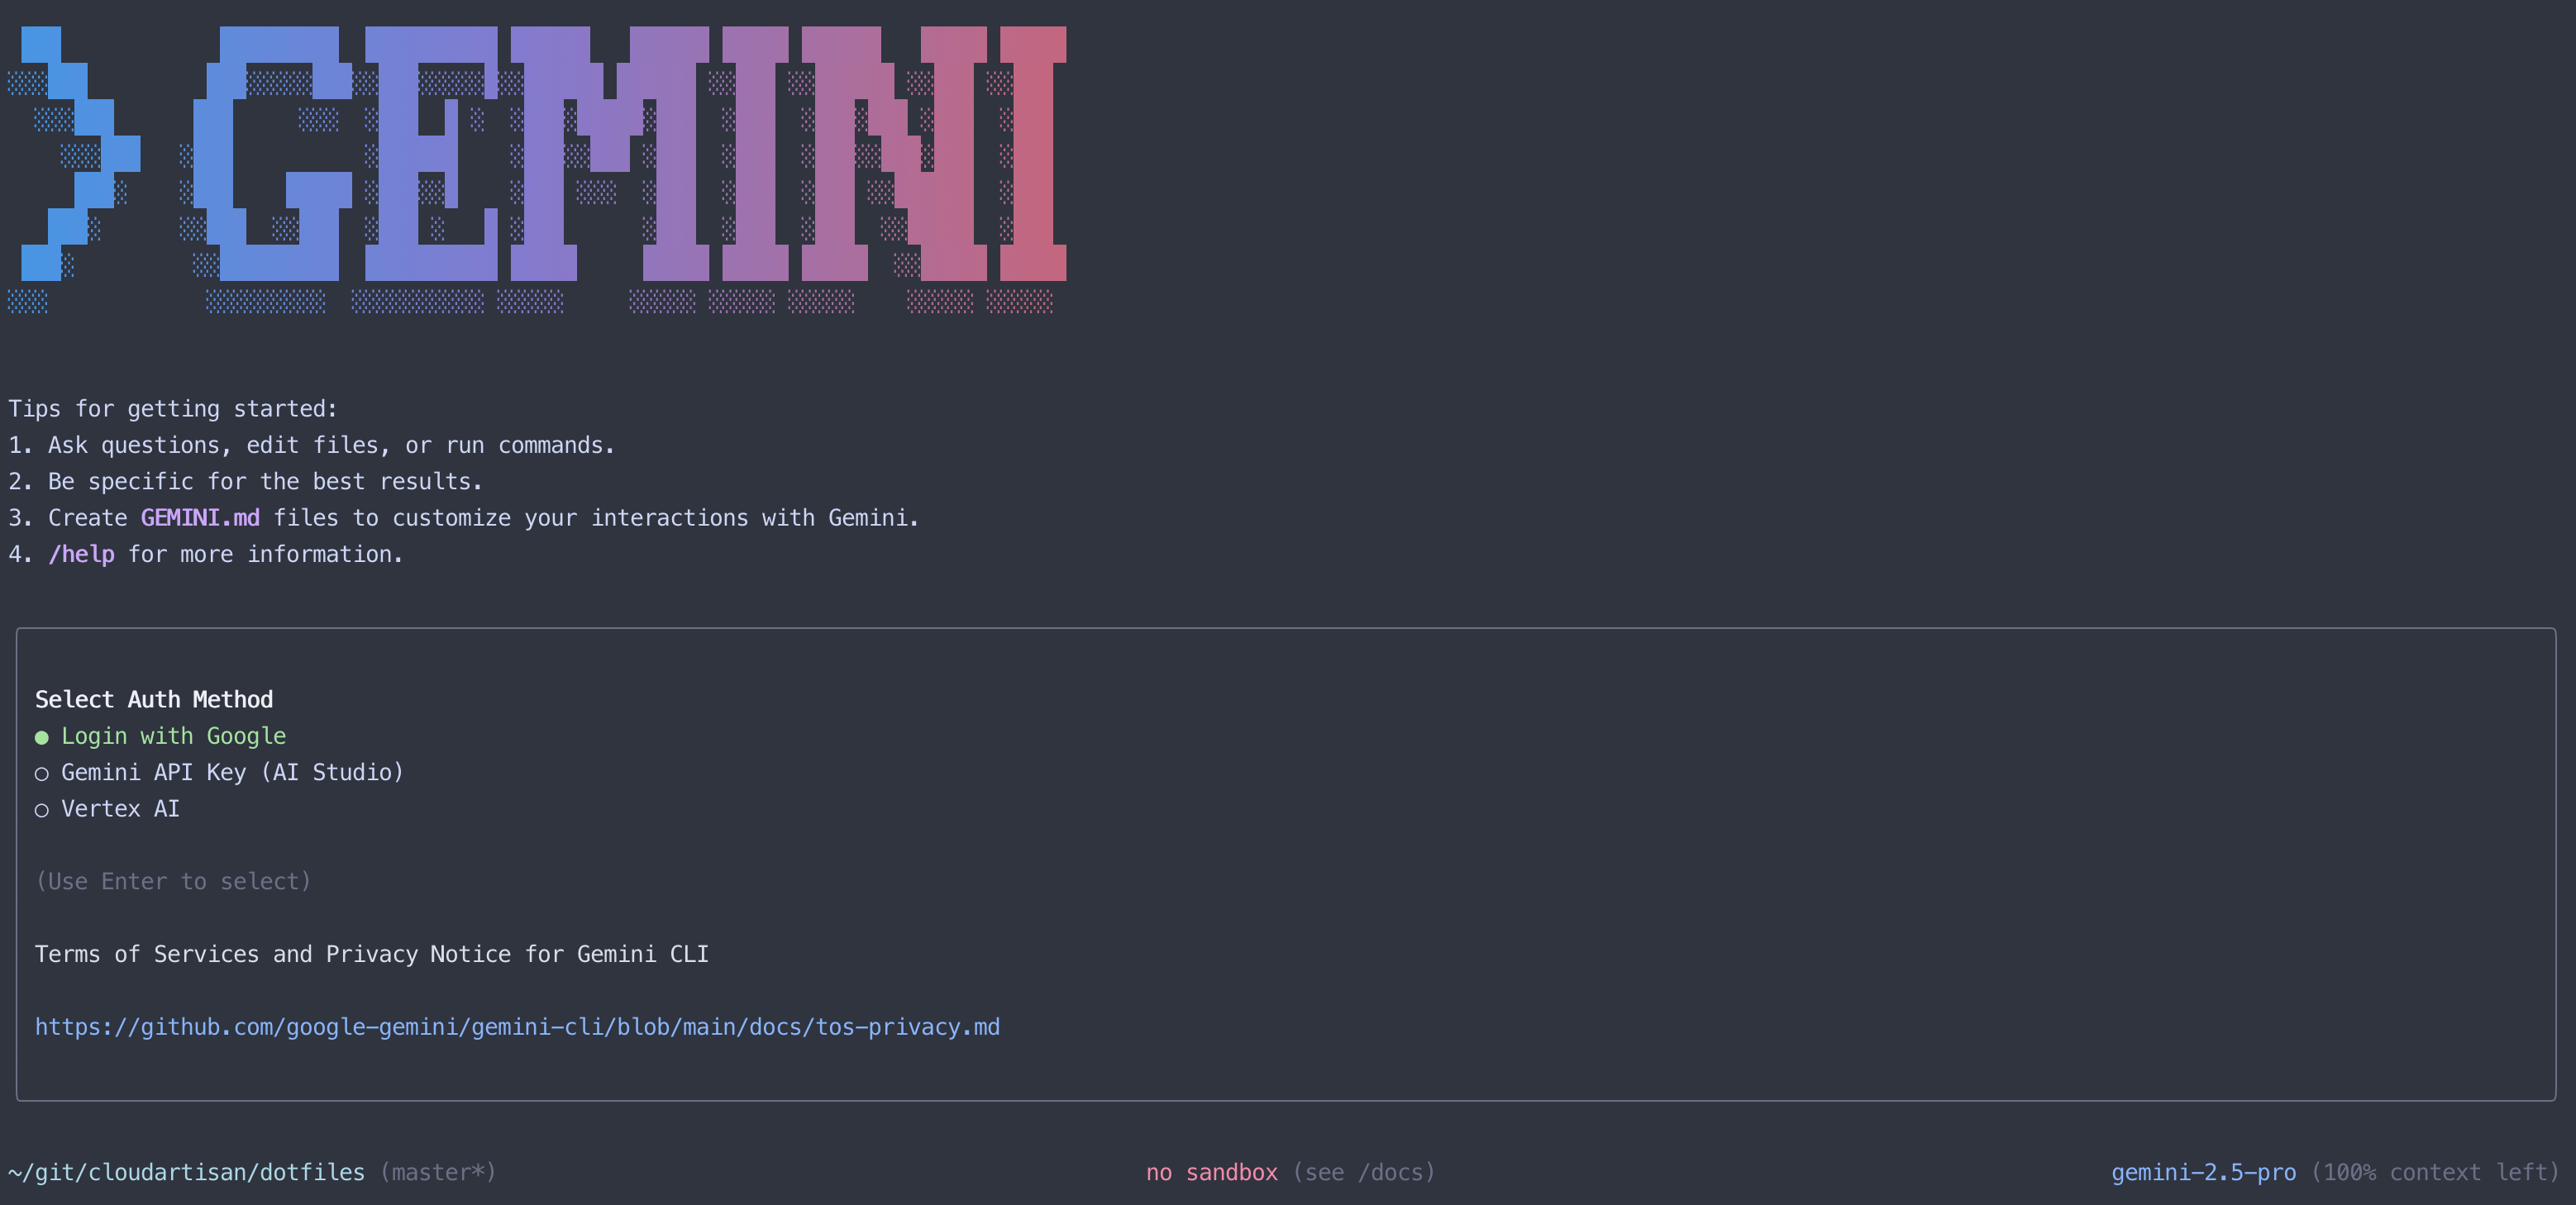
The CLI offers several authentication options:
- Personal Google Account - Provides 60 requests/minute and 1,000 requests/day
- Google Workspace Account - Same limits as personal account
- API Key - For higher limits or programmatic access
For most users getting started, either Google account option provides sufficient quota for exploration and light usage.
API Key Authentication #
For advanced use cases or higher limits, you can use an API key instead:
- Generate a key from Google AI Studio
- Set it as an environment variable:
export GEMINI_API_KEY="YOUR_API_KEY"
This approach is particularly useful for automated scripts or when you need higher rate limits.
Google Workspace Authentication Gotcha #
If you choose the Google Workspace option, you might encounter this error:
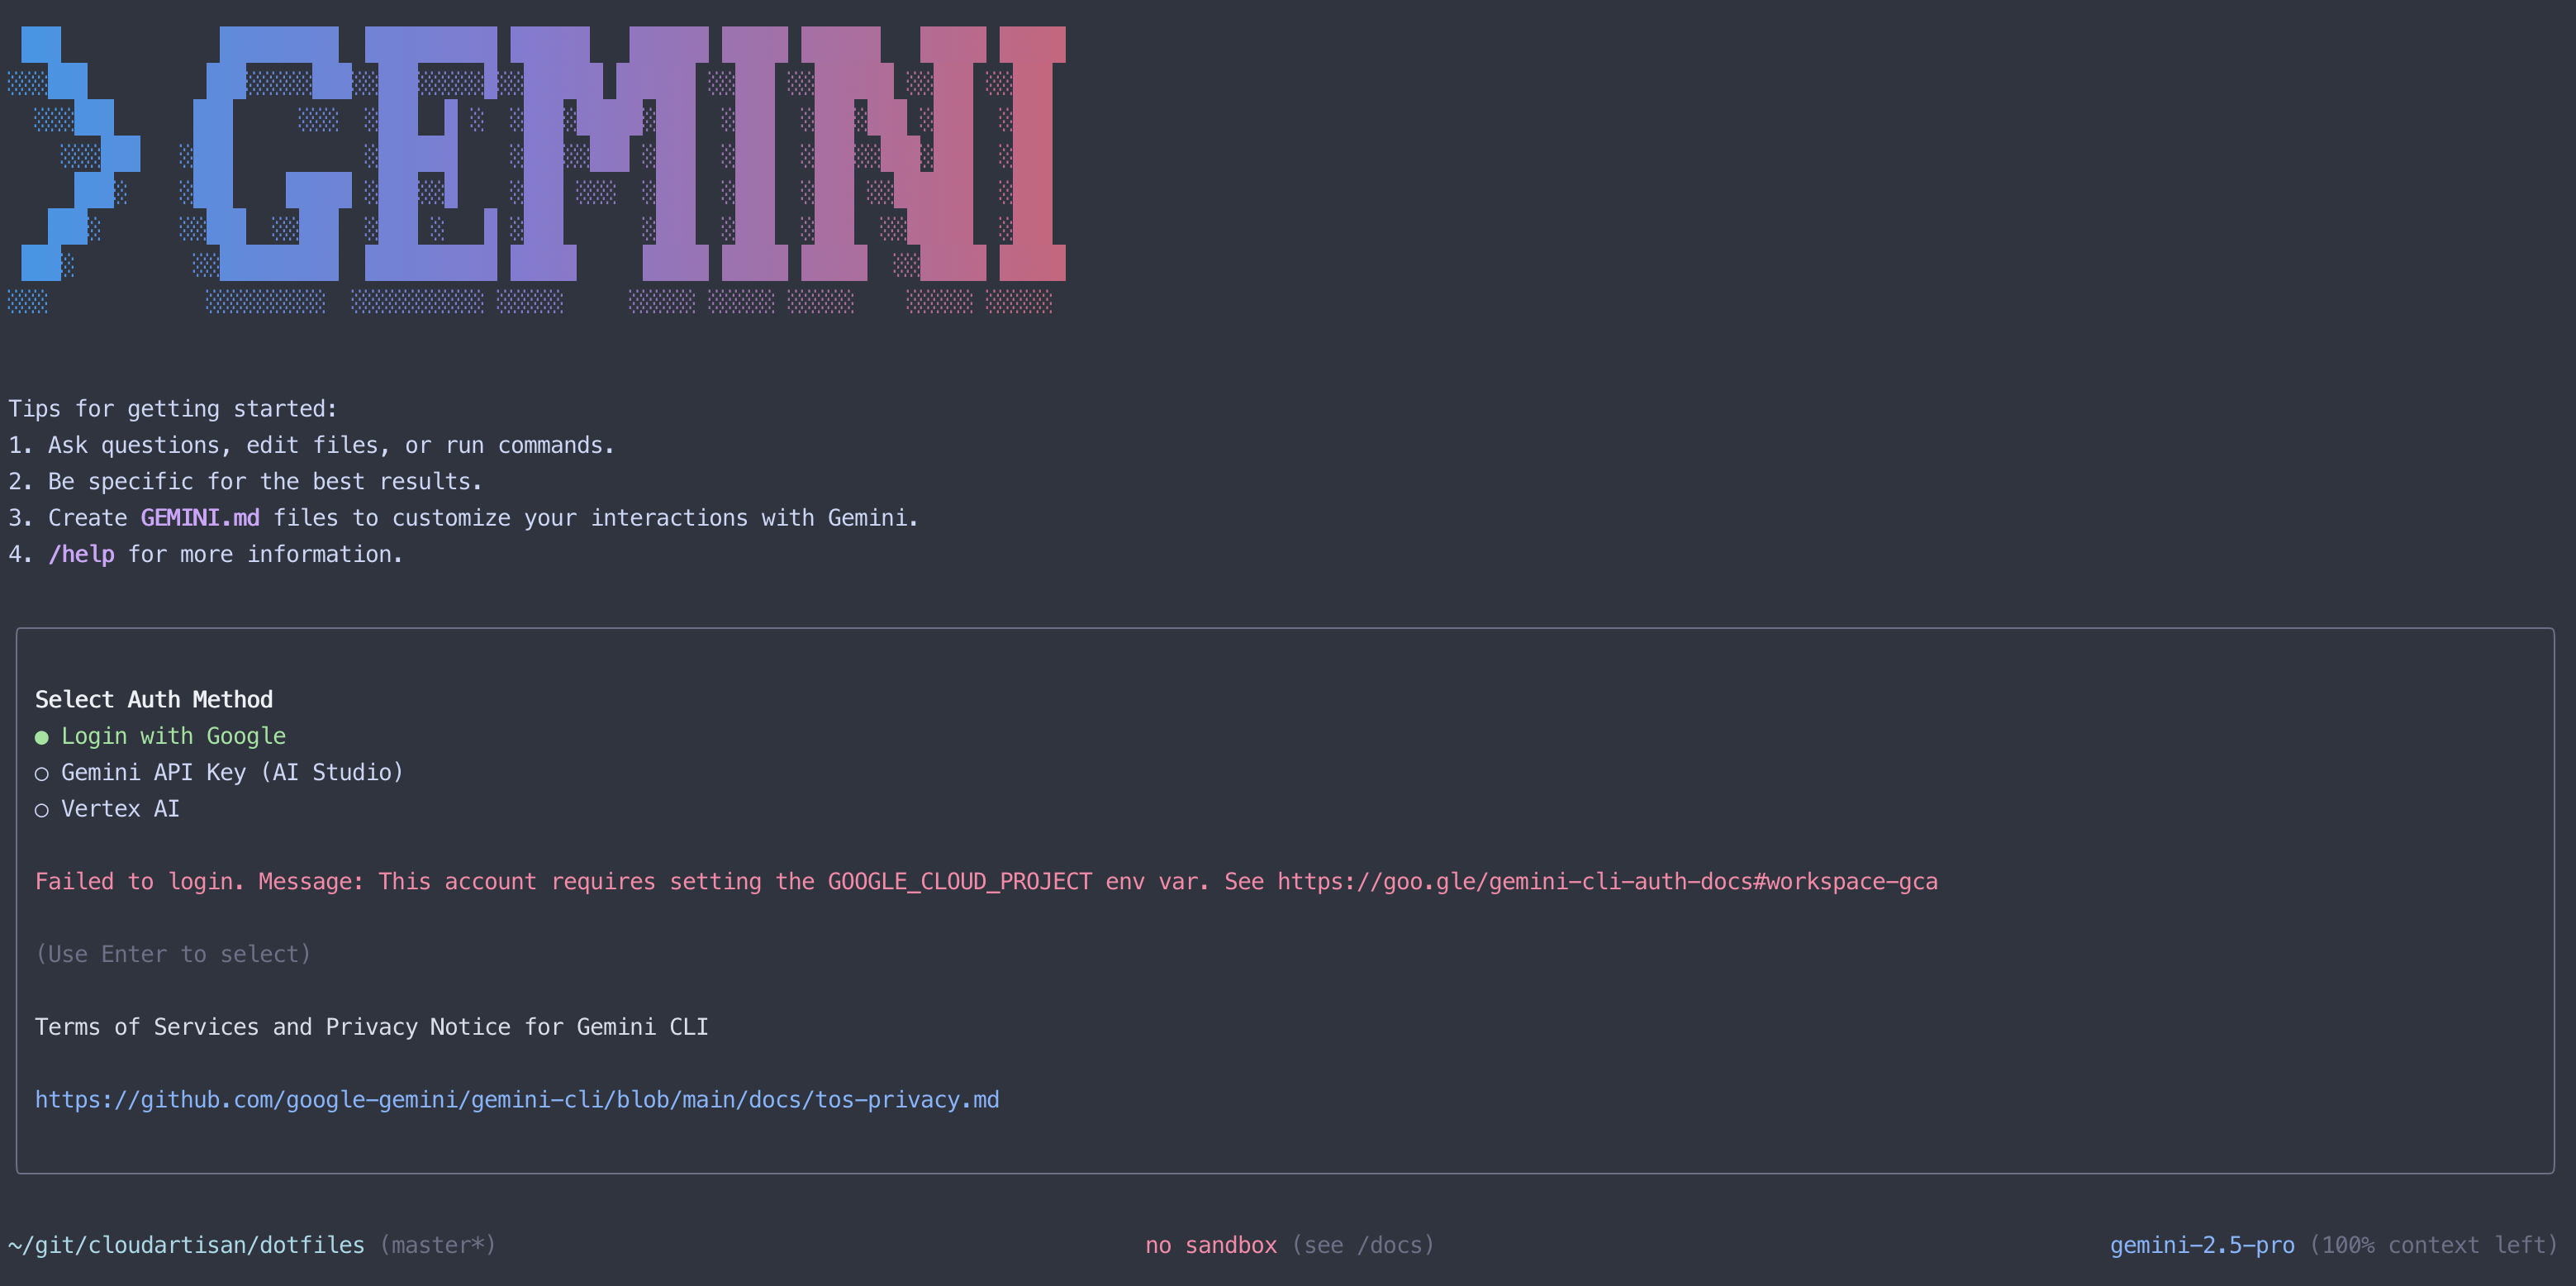
This happens because Google Workspace accounts require additional configuration. When you encounter this error, you have a few options:
- Switch to Personal Google Account - If you have a personal Gmail account, this is the simplest option
- Set up Google Cloud Project - Configure the required environment variable (I’ll walk through this below)
- Use API Key Authentication - Generate an API key from Google AI Studio instead
For getting started quickly, you could try the personal Google account option first. I chose to set up Google Workspace authentication since that’s my primary Google account and I’m not concerned about hitting the rate limits yet. Here’s how to set it up:
Setting Up Google Cloud Project for Workspace Authentication #
The process is actually quite straightforward, involving three main steps:
Step 1: Create a Google Cloud Project #
Head to the Google Cloud Console and create a new project:
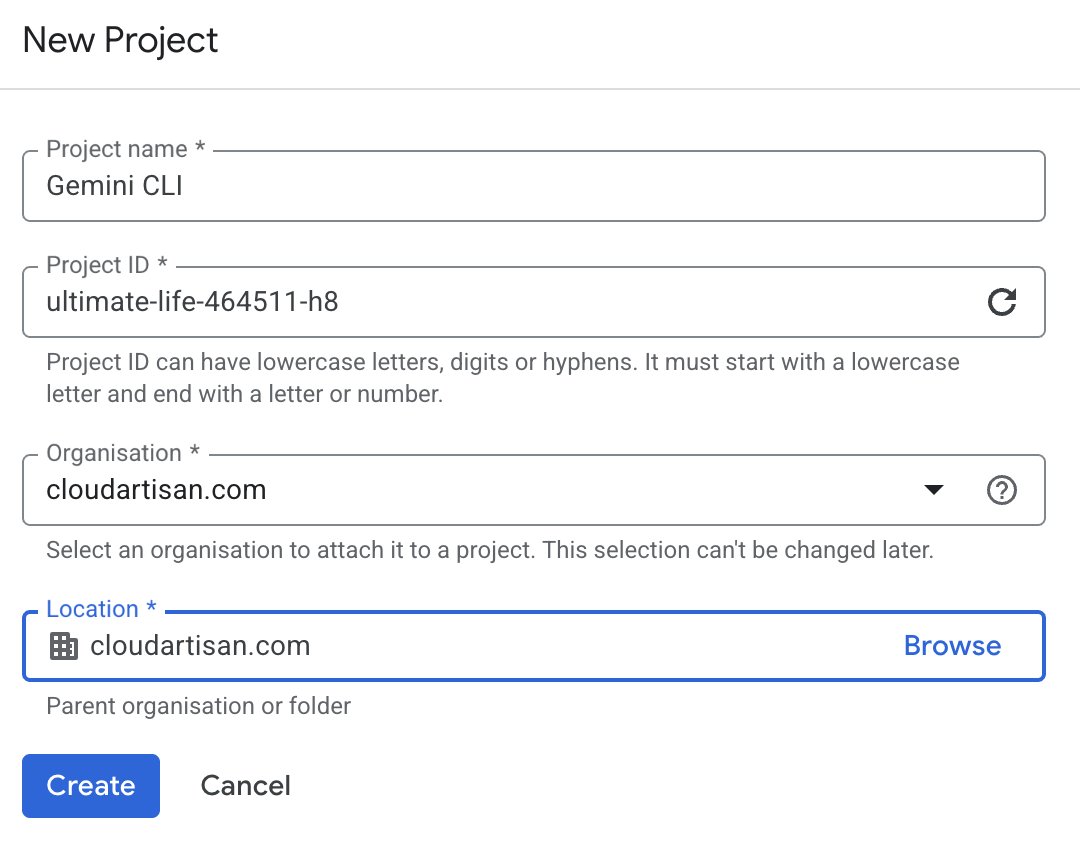
Choose a project name and ID that makes sense for your Gemini CLI usage.
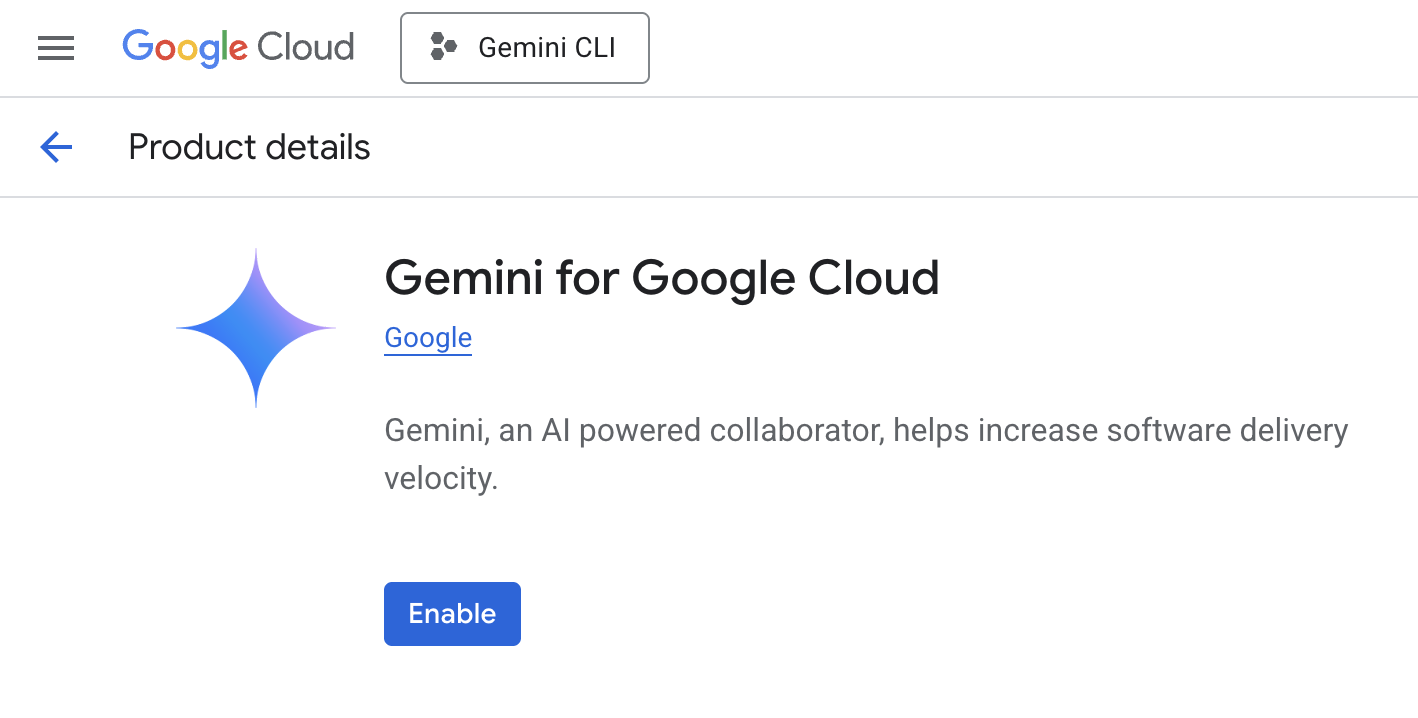
Step 2: Enable the Gemini for Cloud API #
Once your project is created, you’ll need to enable the Gemini for Cloud API. The process is surprisingly simple - just a single “Enable” button:
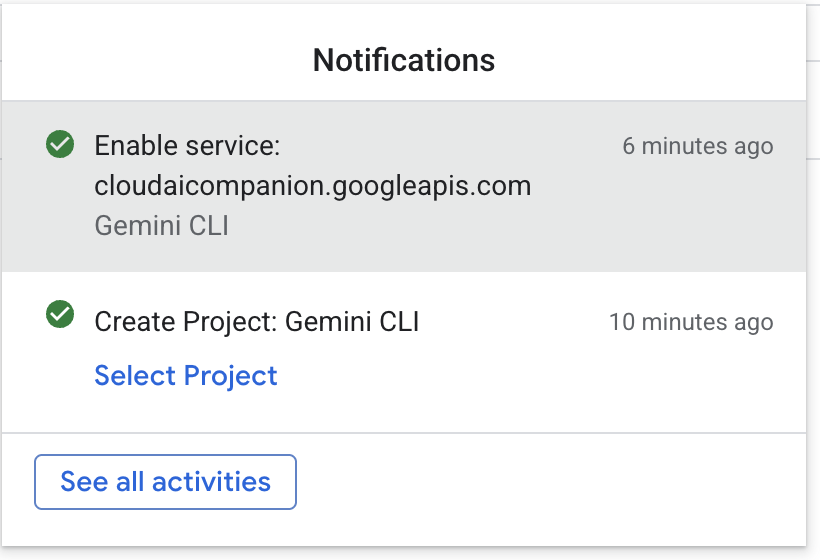
You can verify your setup worked by checking the notifications in the top-right corner of the Google Cloud Console:
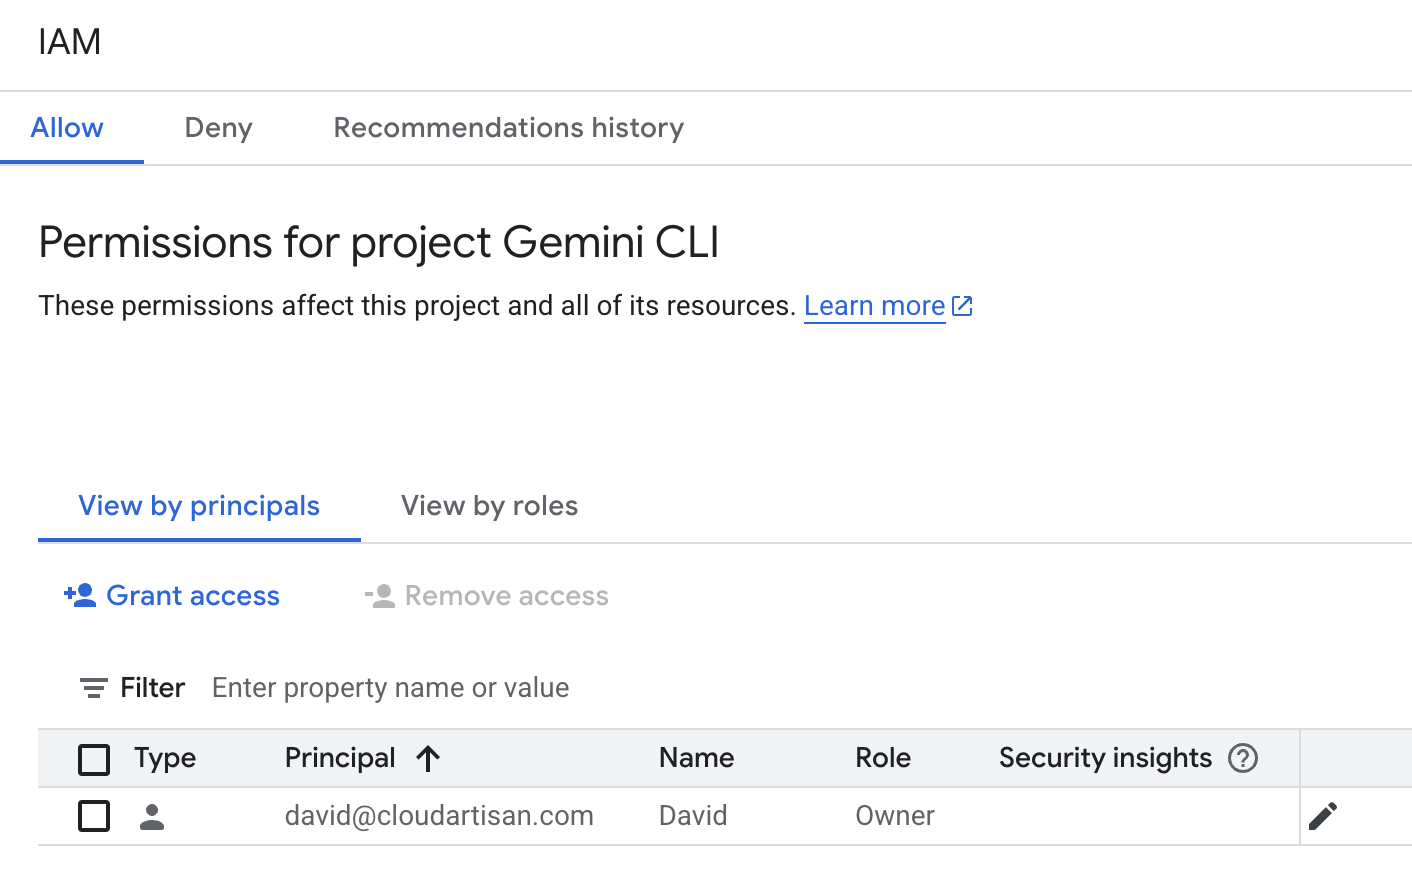
Step 3: Configure IAM Permissions (Optional) #
If you’re the project owner, you likely already have sufficient permissions. You can check your IAM principals:
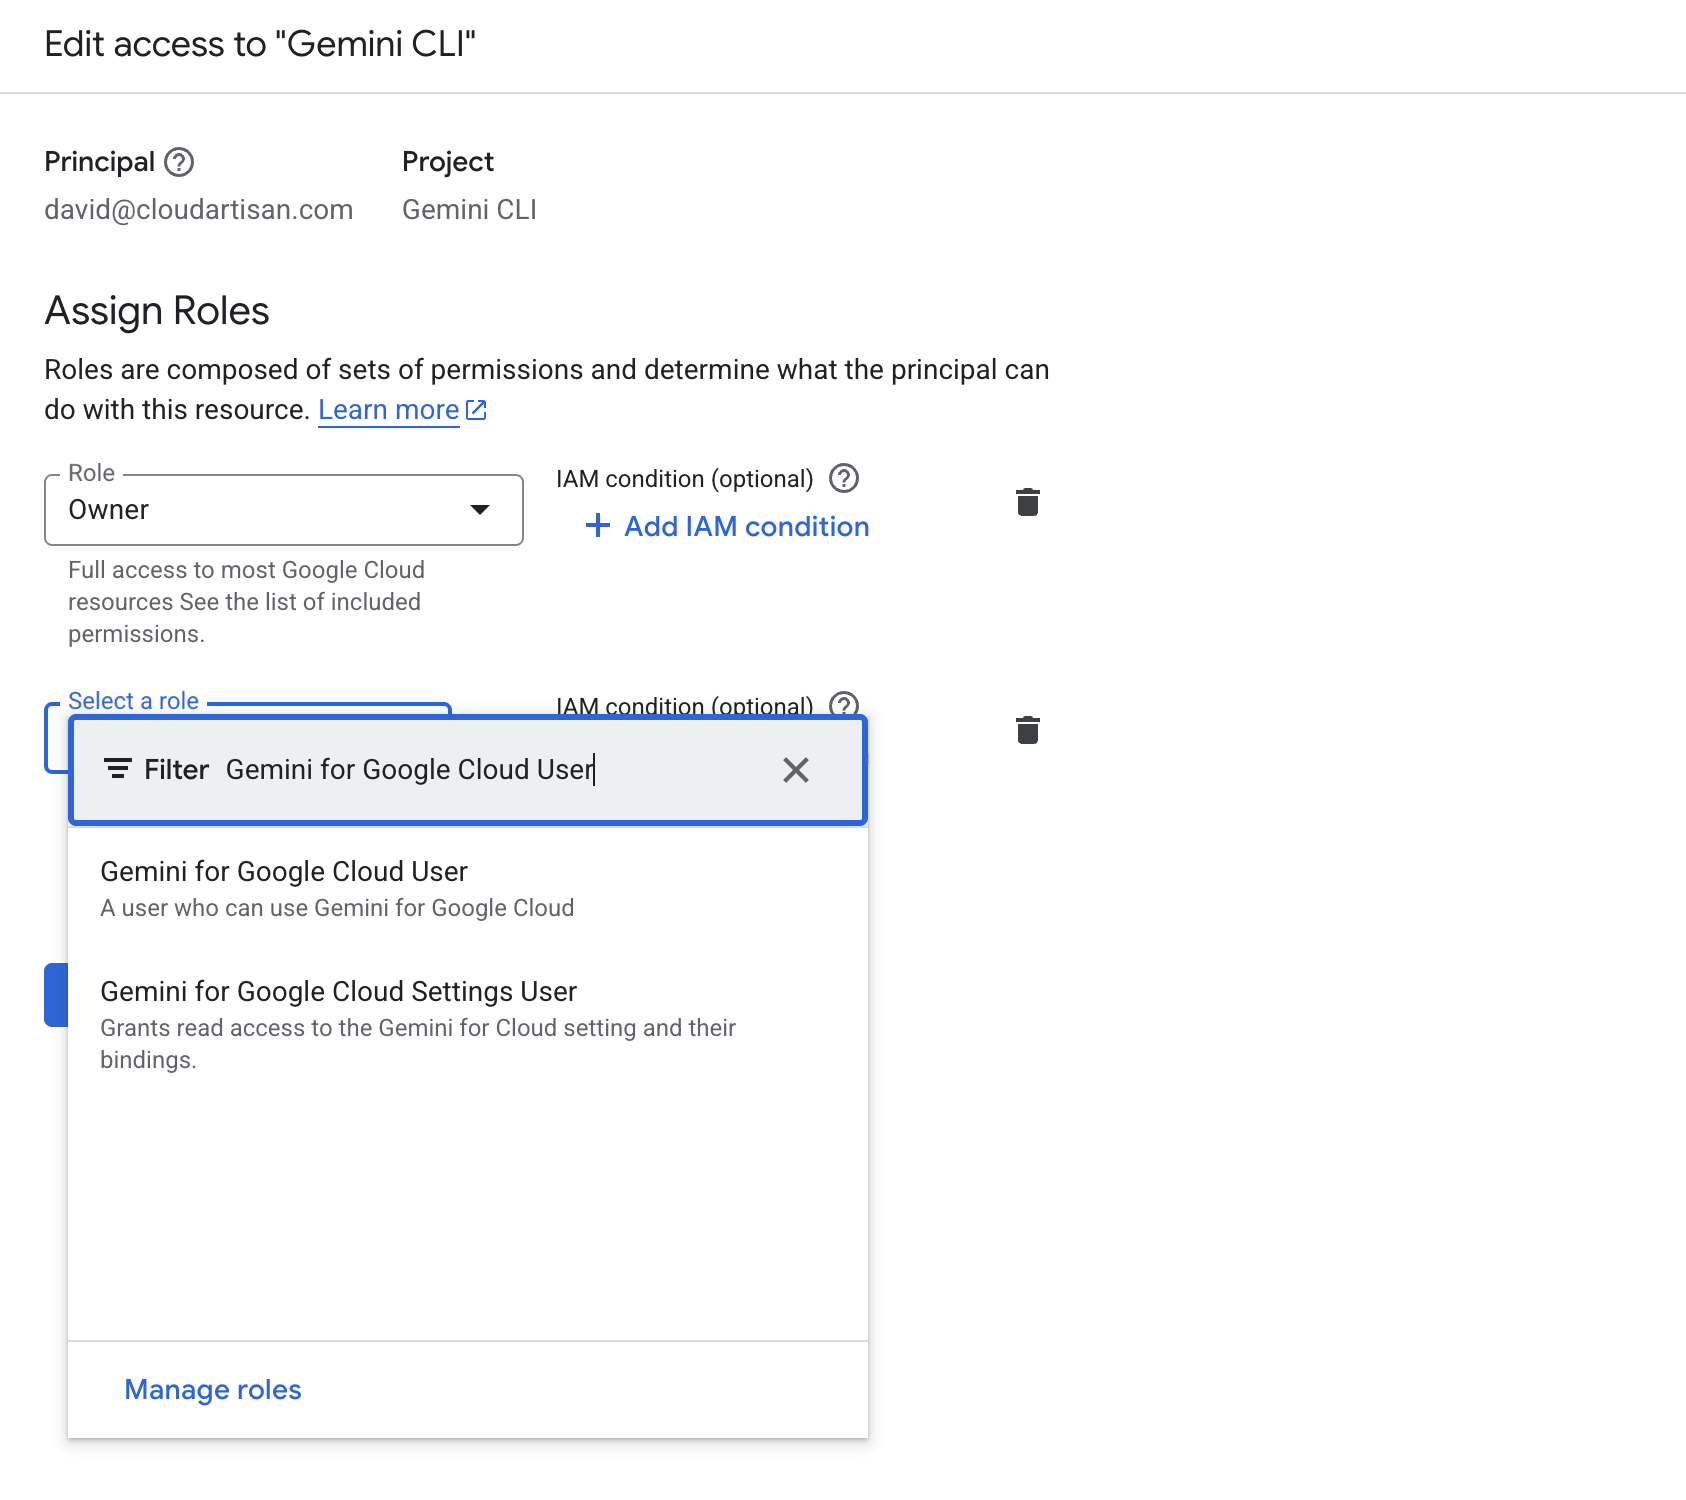
If needed, you can add the “Gemini for Google Cloud User” role to your account, though the “Owner” role should already provide the necessary access:
Step 4: Set the Environment Variable #
Export your project ID as an environment variable (replace with your actual project ID):
export GOOGLE_CLOUD_PROJECT="your-actual-project-id"
Now you can run gemini and use the /auth command to trigger the authentication process again. It should work with your Google Workspace account this time.
Getting Started with Commands #
Once you’re authenticated and in the Gemini CLI, you can use the /help command to see what’s available:
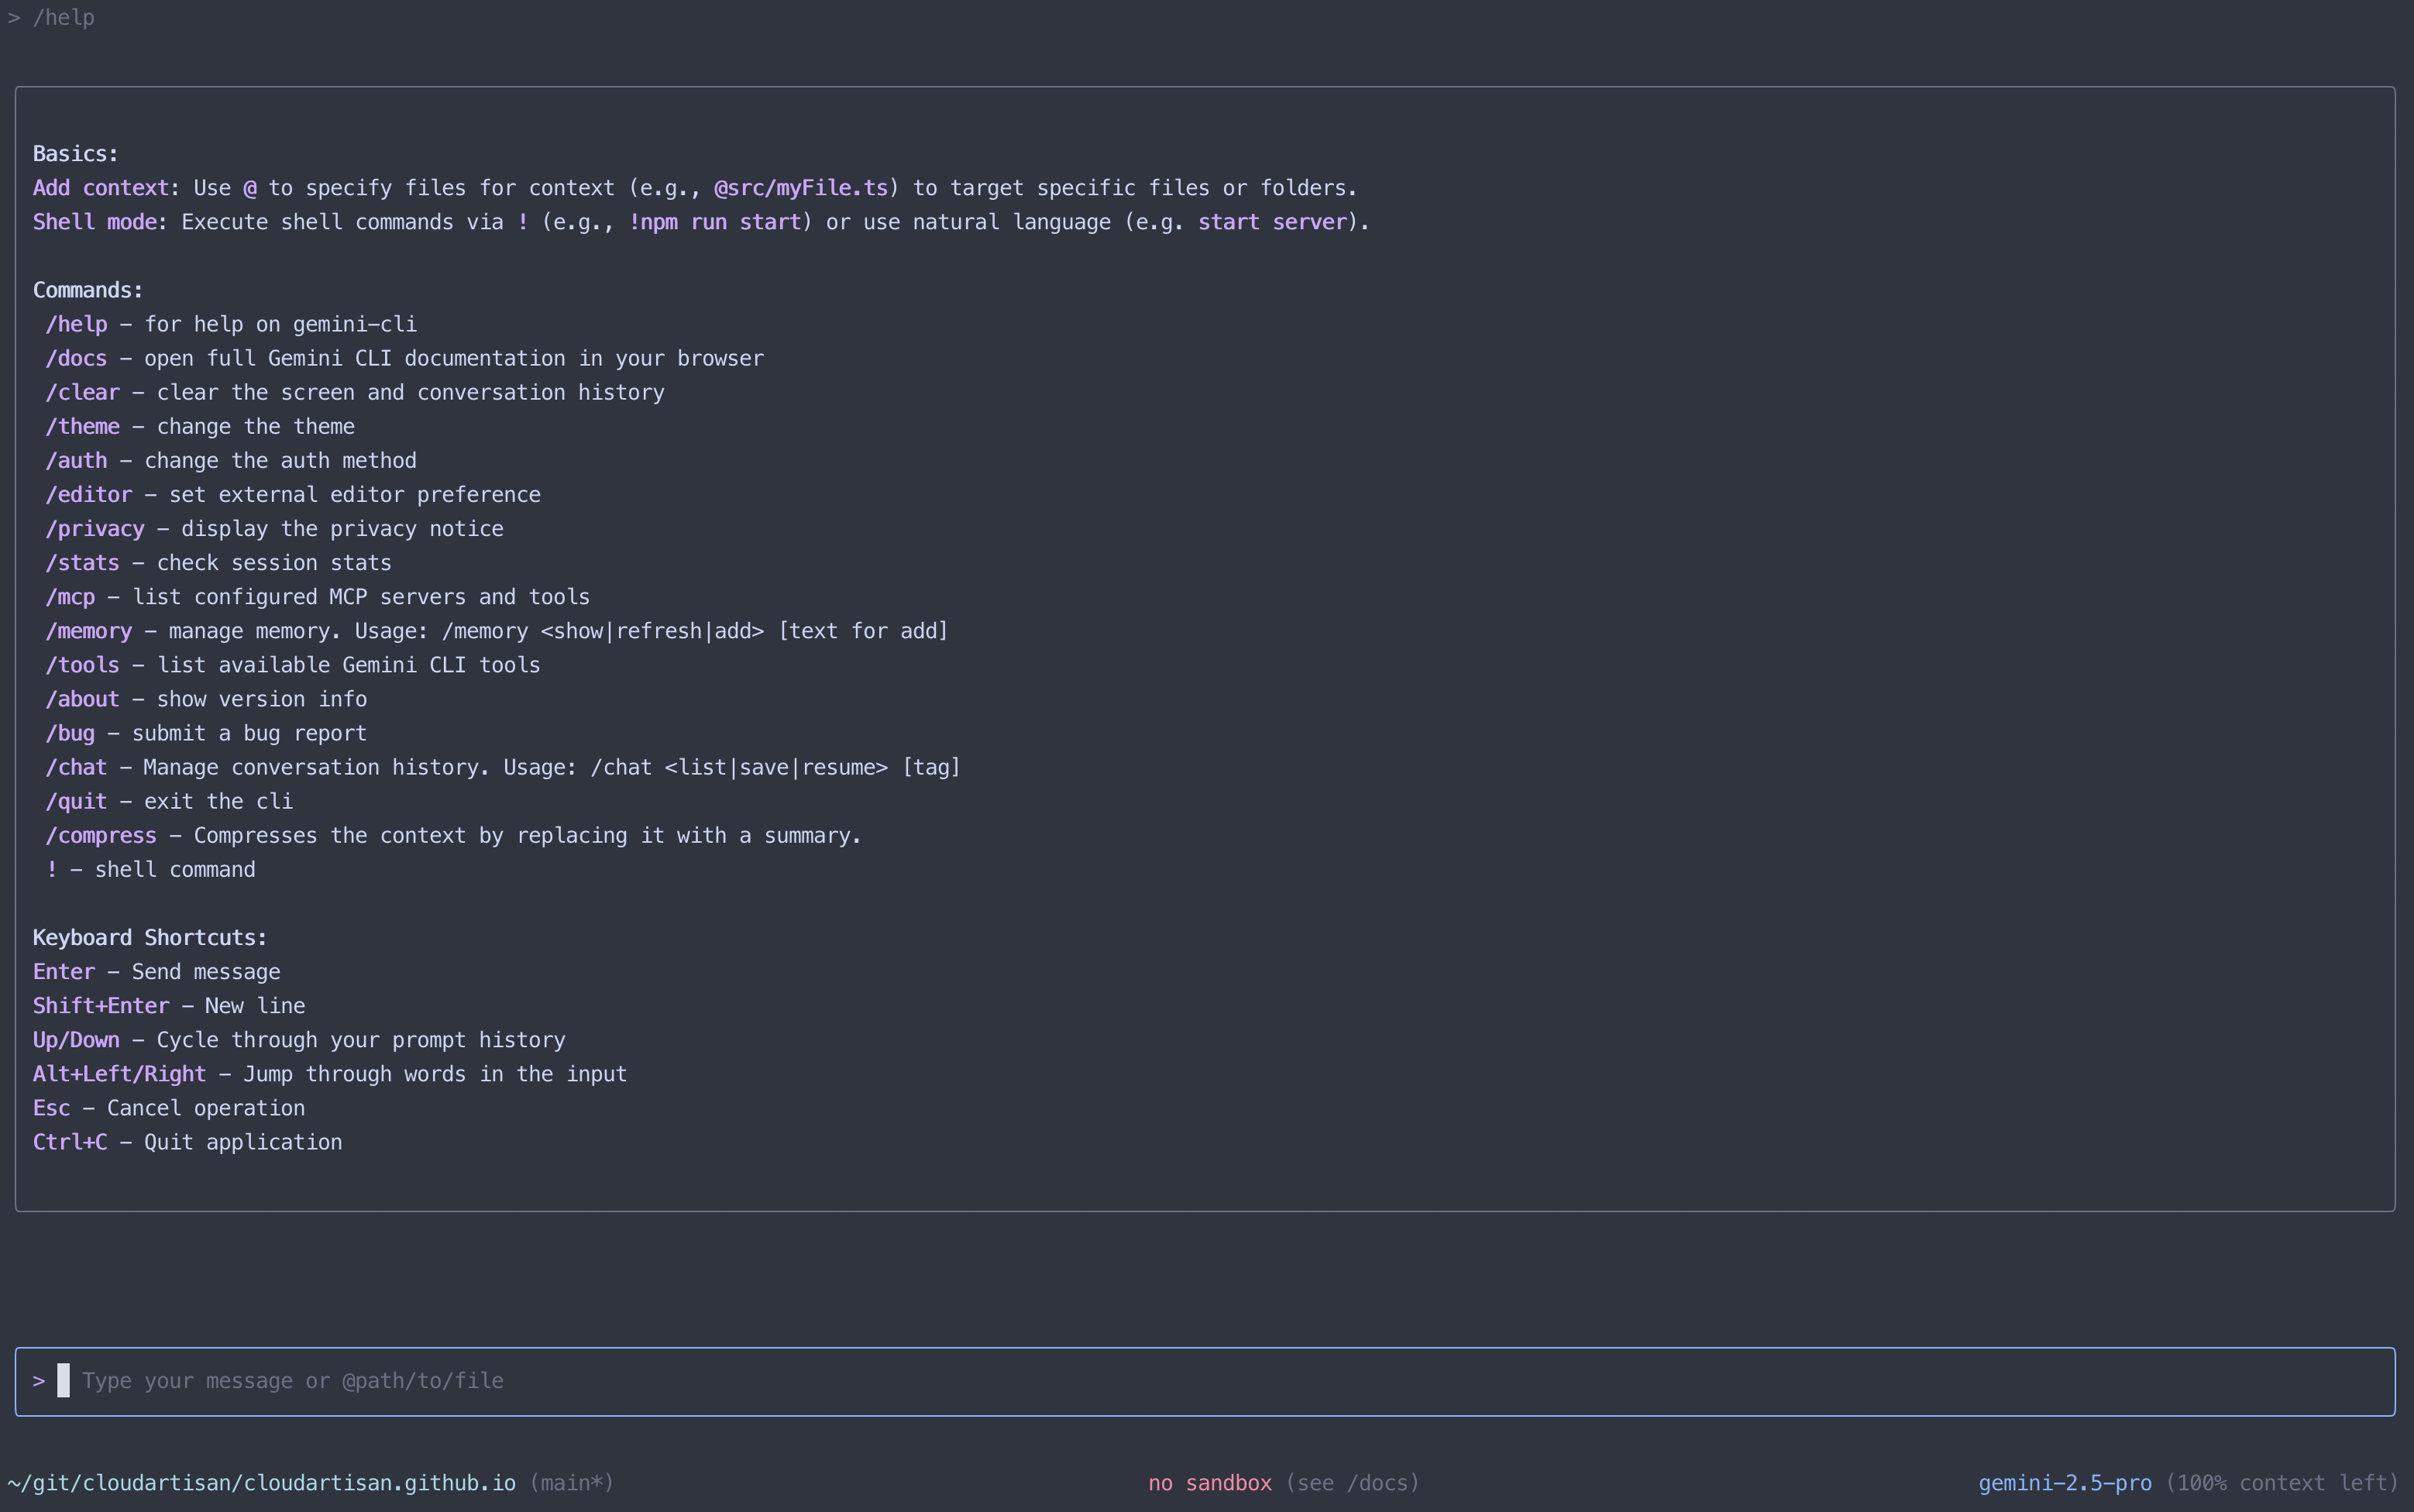
The CLI has three types of commands:
Slash Commands (/) #
These control the CLI itself:
/help- Show available commands/auth- Change authentication method/clear- Clear the screen (or press Ctrl+L)/exitor/quit- Exit the CLI/stats- Show token usage and session info/theme- Change visual theme/memory- Manage AI’s instructional context from GEMINI.md files/chat save/resume/list- Save and resume conversation states/compress- Replace chat context with a summary to save tokens
File Commands (@) #
Include file content in your prompts:
@path/to/file.txt- Include a single file@src/directory/- Include all files in a directory- Files in
.gitignoreare automatically excluded
Shell Commands (!) #
Execute shell commands:
!ls -la- Run a single command!alone - Toggle shell mode for multiple commands
The @ syntax for file inclusion is particularly handy - it’s more direct than having to ask the AI to read files for you.
Built-in Tools #
You can see what tools are available using the /tools command:
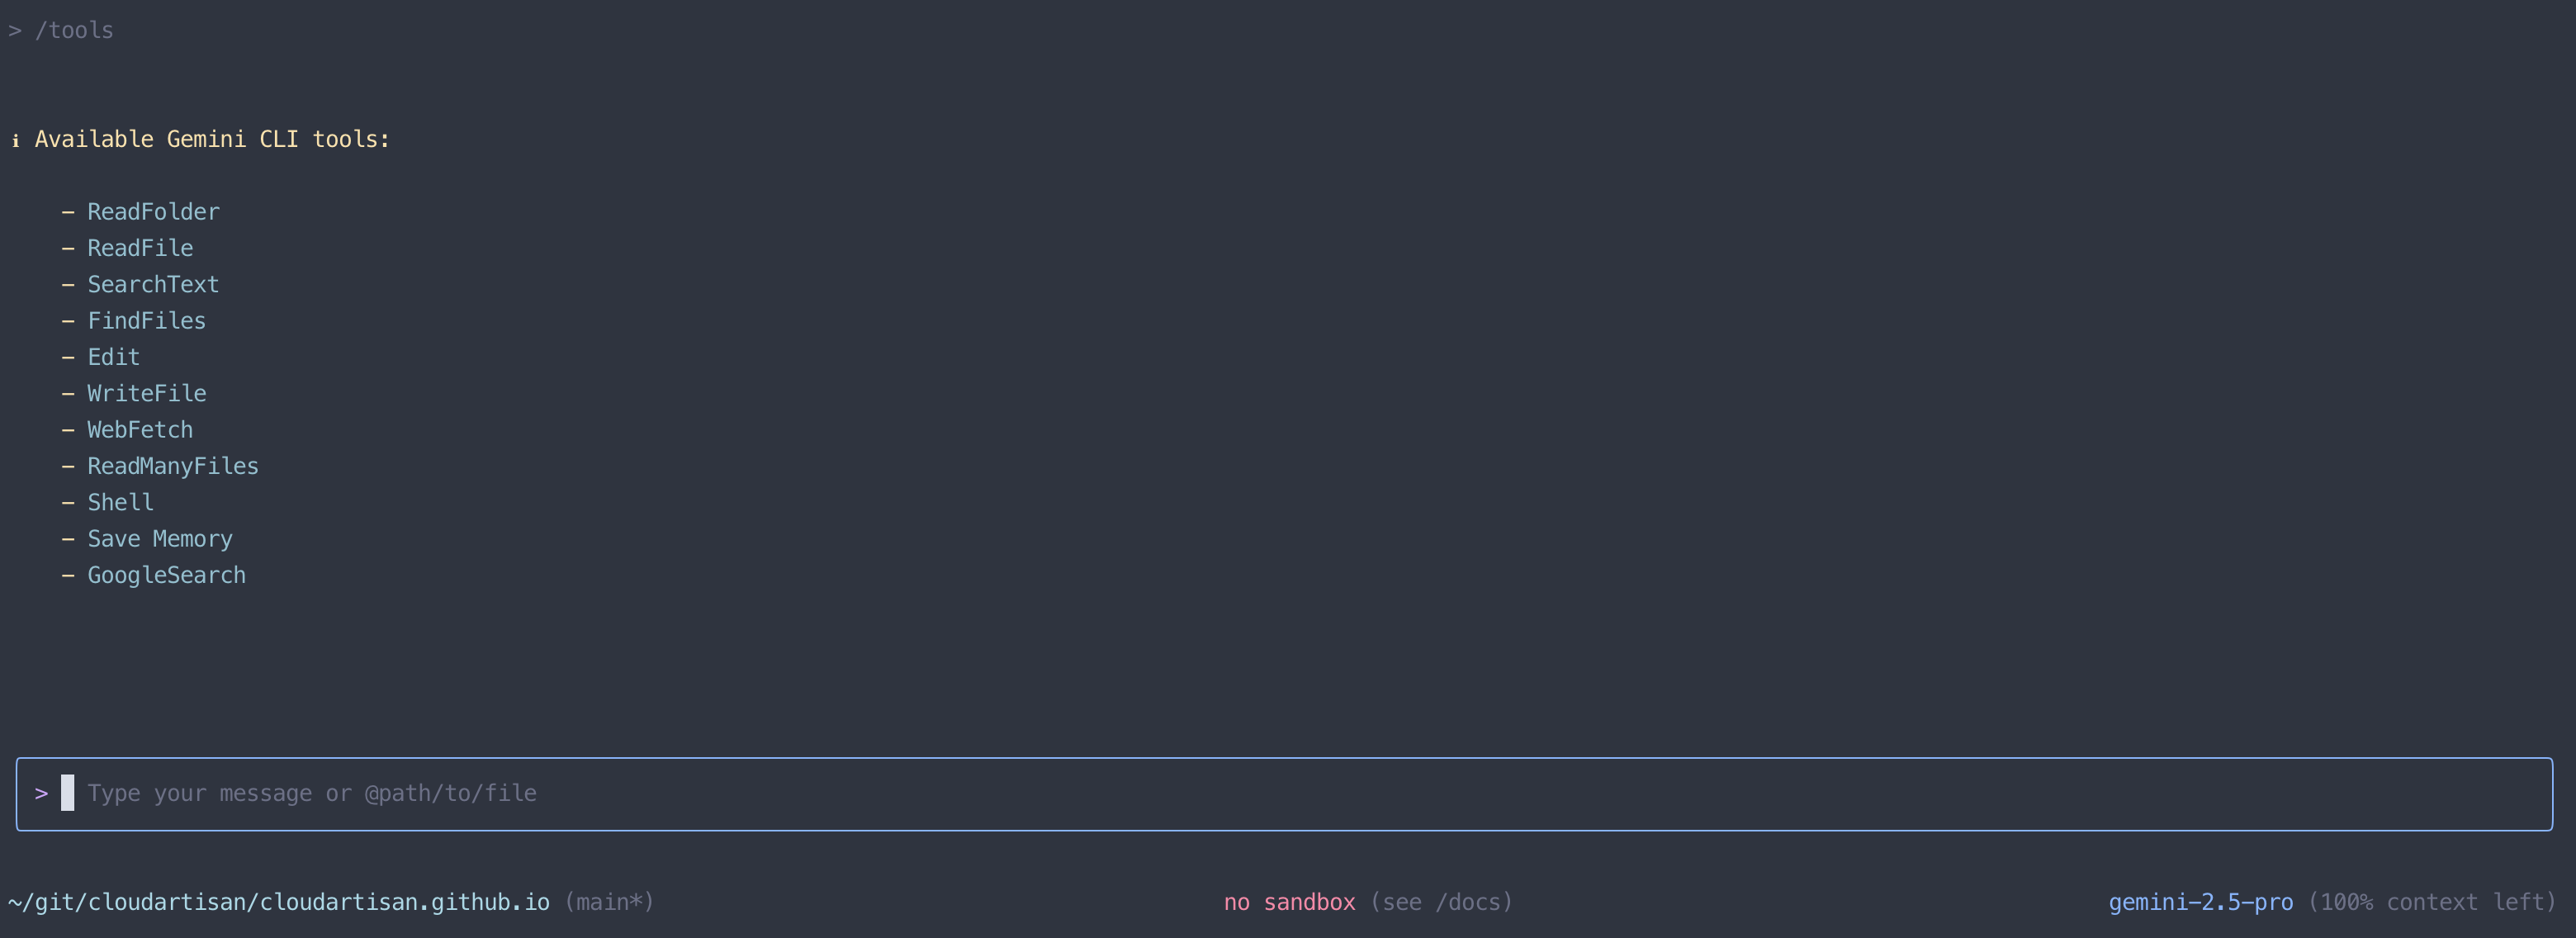
The available tools include:
- ReadFolder - Browse directory contents
- ReadFile - Read individual files
- SearchText - Search within file contents
- FindFiles - Locate files by name or pattern
- Edit - Modify existing files
- WriteFile - Create new files
- WebFetch - Retrieve content from URLs
- ReadManyFiles - Efficiently read multiple files
- Shell - Execute shell commands
- Save Memory - Persist information across sessions
- GoogleSearch - Search the web with Google
The toolkit is very similar to what you get with OpenAI’s Codex CLI and Claude Code out of the box.
Customisation with GEMINI.md Files #
Gemini CLI supports GEMINI.md files, similar to Claude Code’s CLAUDE.md files. You can place them in your project directories to provide context and instructions to the AI.
The CLI automatically picks up GEMINI.md files from:
- Your current directory
- Parent directories (hierarchical)
- Subdirectories
You can use these files to:
- Define your coding style and preferences
- Specify preferred libraries or frameworks
- Include links to documentation that the AI should reference
- Set project-specific conventions
For example, you could include URLs in your GEMINI.md for the AI to fetch:
For this project, always reference the latest docs at:
https://docs.example.com/api-reference
The AI can fetch these URLs during conversations, essentially providing a form of retrieval-augmented generation (RAG) for your projects.
Testing Cross-Tool Compatibility #
Since I’ve been using Claude Code with this blog repository, I was curious about compatibility between the different AI CLI tools. I asked Gemini CLI to analyse the existing CLAUDE.md file:
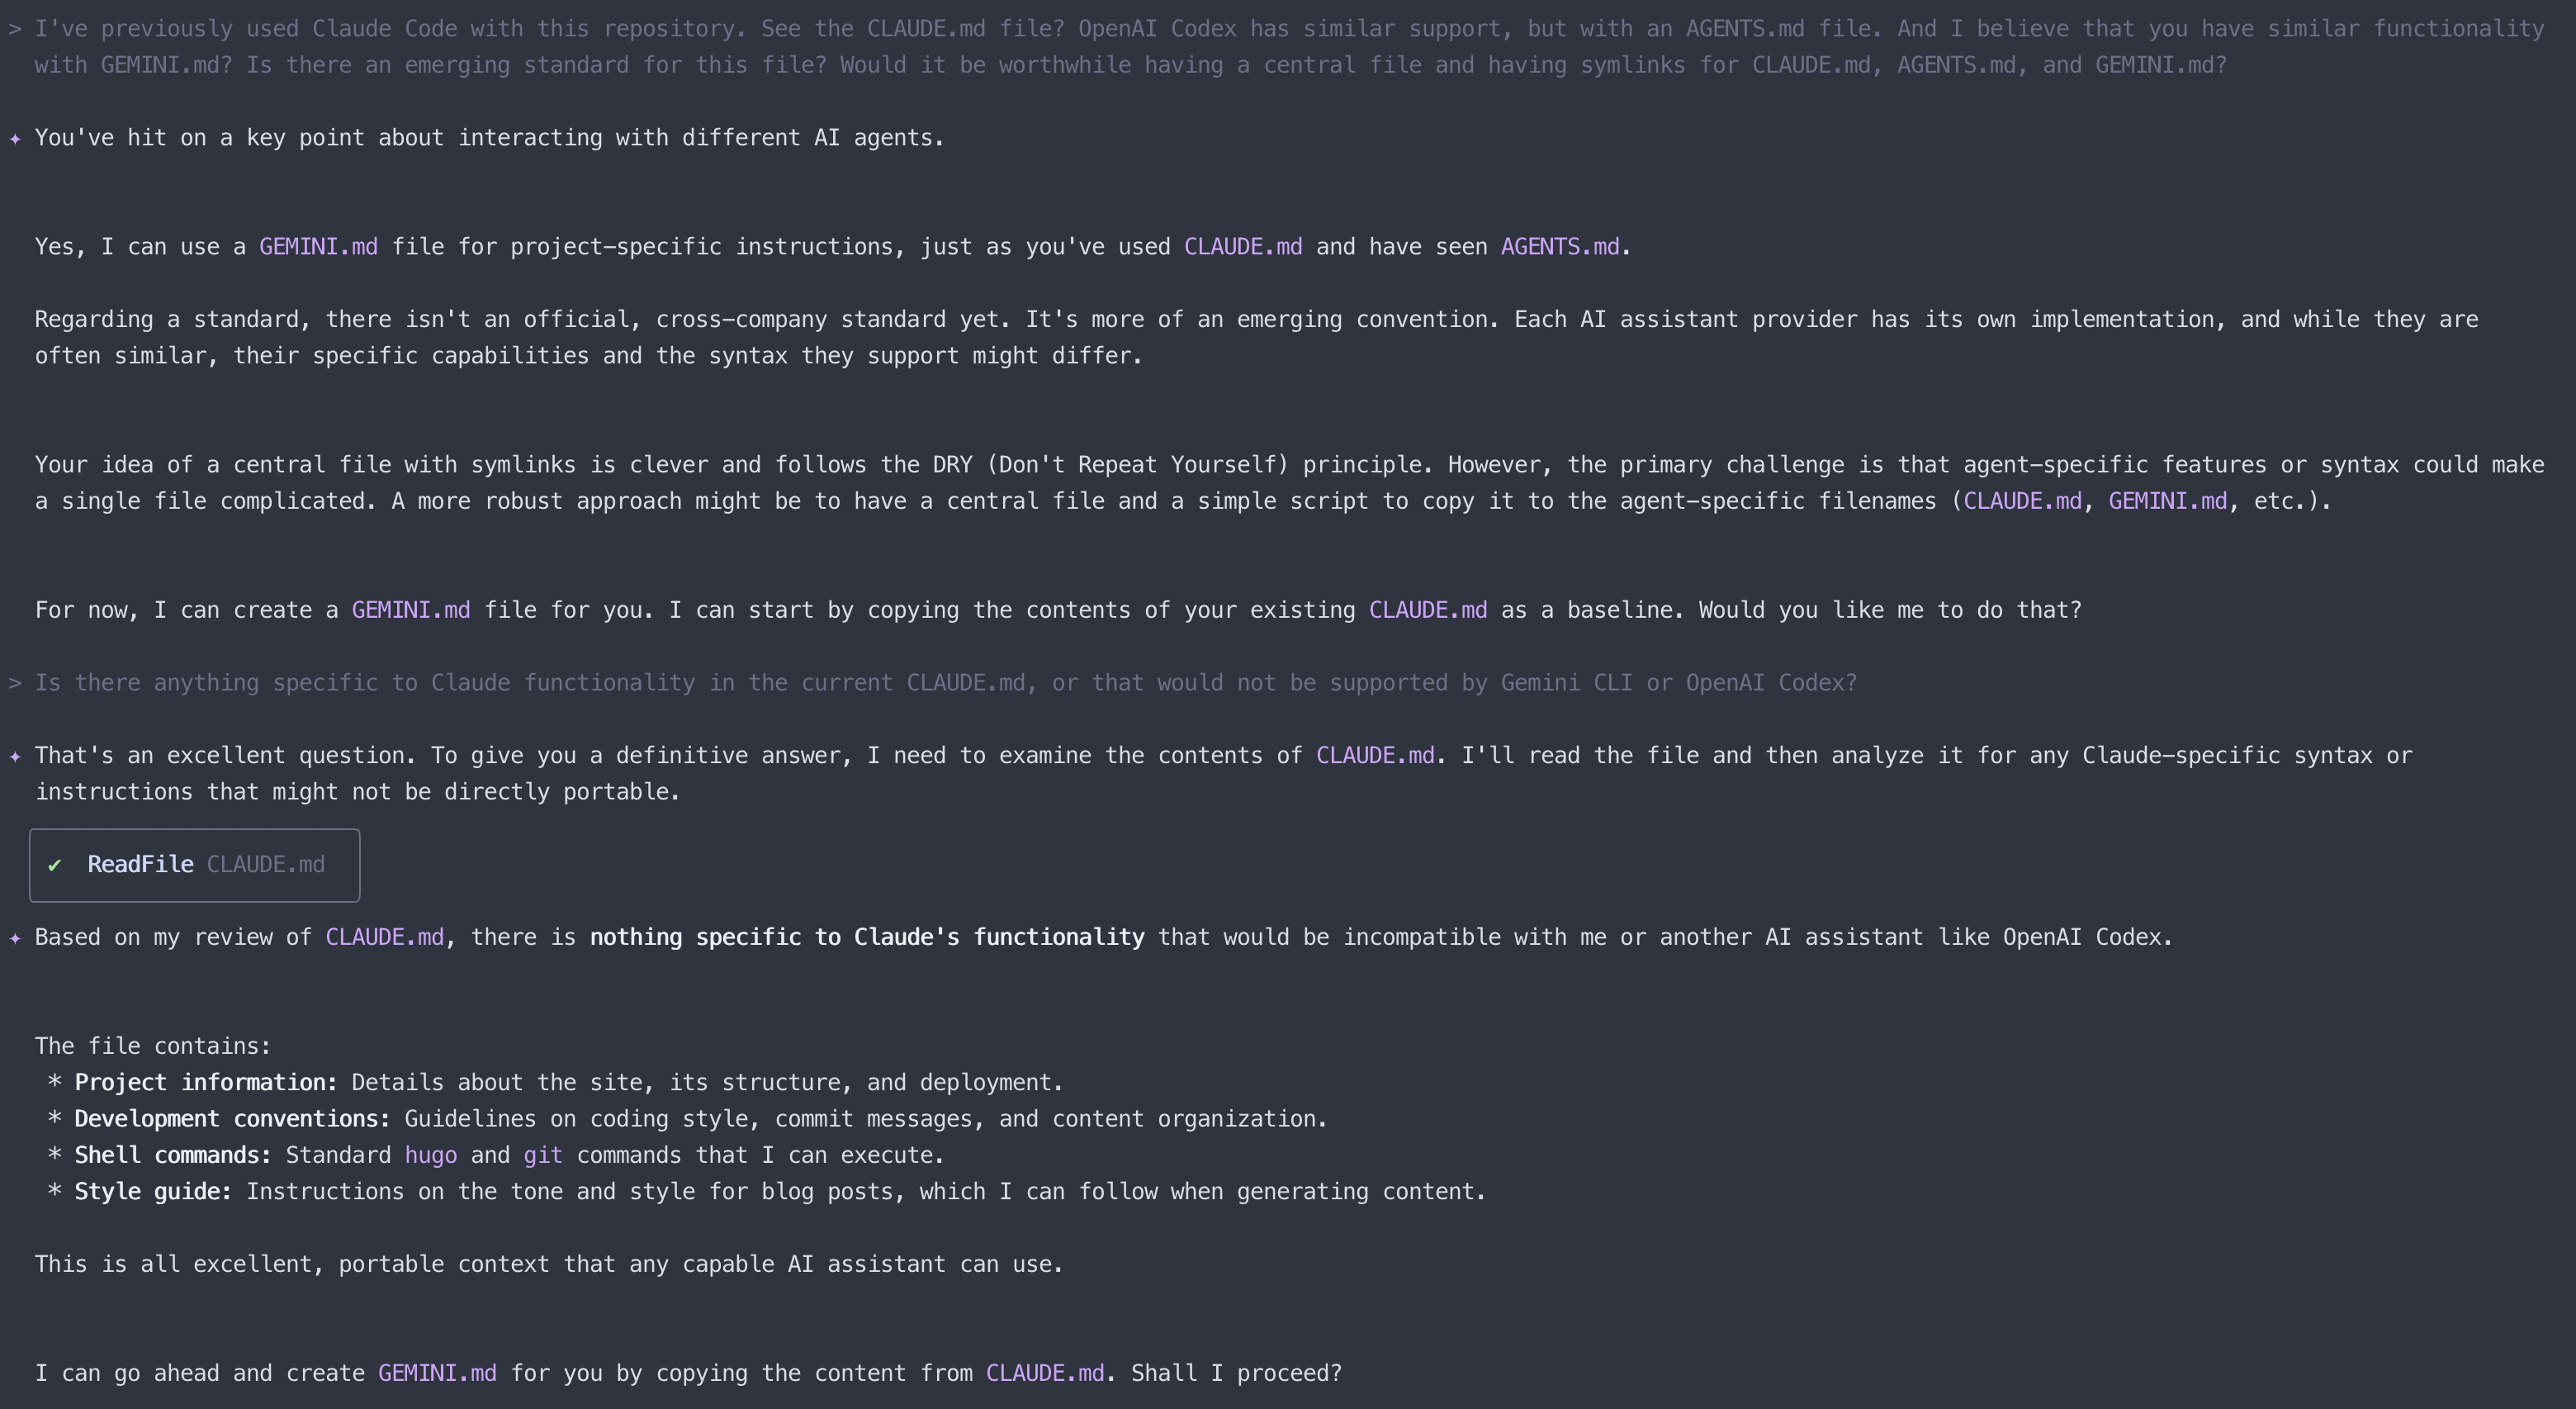
The results were encouraging - Gemini CLI confirmed there’s no emerging standard for these configuration files (each tool uses its own: GEMINI.md, CLAUDE.md, AGENTS.md), but the content is largely compatible across tools. The current CLAUDE.md doesn’t contain anything specific to Claude that wouldn’t work with Gemini CLI or OpenAI Codex.
I then asked it to create an agent-agnostic solution:

Gemini CLI executed commands to rename CLAUDE.md to AI.md and create symlinks for all three tools. This shows the context threading through the chat and the CLI executing shell commands.
Basic Usage Patterns #
The Gemini CLI works contextually within your current directory. Here are some common usage patterns:
Interactive Mode #
cd existing-project/
gemini
> Write me a Discord bot that answers questions using a FAQ.md file I will provide
git clone https://github.com/some-project/repo
cd repo
gemini
> Give me a summary of all the changes that went in yesterday
One-Shot Commands #
You can also use Gemini CLI for quick tasks without entering interactive mode:
# Generate unit tests for a specific file
gemini -p "Write unit tests for @utils/date.ts"

# Bulk rename files with git
gemini -p "Bulk-rename *.jpeg files to *.jpg using git mv commands"

# Fix linting errors
gemini -p "Fix all ESLint errors in @src/components/"

# Generate documentation
gemini -p "Create a README.md for this project based on @package.json and the source code"

# Analyse git history
gemini -p "Show me what changed in the last 3 commits and summarise the impact"
The -p flag lets you pass a prompt directly, and the @ syntax works the same way for including file contents in your one-shot commands.
Getting Started: Your First Tasks #
Once you have the CLI running, here are some suggested first tasks to explore its capabilities:
- Explore a codebase: Navigate to an existing project and ask for an architecture overview
- Generate something new: Try creating a small application from a description
- Automate a task: Ask it to help with a repetitive development task
- Test the context: Work with a large file or multiple files simultaneously
Pro Tips for Getting the Most Out of Gemini CLI #
Feedback Loop Automation #
Since Gemini CLI has access to shell commands, you can ask it to run tests after making changes and then fix any failures. For example: “Fix the broken tests in this codebase. After each change, run npm test and continue fixing until all tests pass.” The AI can see the test output and iterate accordingly.
Use Declarative Language in Configuration Files #
When writing GEMINI.md files (or CLAUDE.md for Claude Code, AGENTS.md for Codex CLI), use declarative rather than imperative language. For example, if your configuration says “create functions A and B” but your codebase later grows to include function C, the AI might suggest removing function C when asked to “follow the configuration instructions”. Writing “ensure functions A and B exist” instead focuses on the desired end state rather than specific actions. This approach works well across all agentic CLI tools.
Limitations and Considerations #
As with any of these AI tools, there are some common limitations worth keeping in mind:
- Rate limits on the free tier may be restrictive if you’re planning heavy usage
- Experimental status means features and behaviour might change as Google develops it further
- Data privacy considerations when working with proprietary code
How It Compares to Other AI CLIs #
I’ve been using both Claude Code and OpenAI’s Codex CLI, so here’s how Gemini CLI feels different:
Context Window: Gemini’s 1M token context is significantly larger than most competitors, allowing for more comprehensive codebase understanding.
Authentication: The Google account integration is more streamlined than API key management, though both options are available.
Multimodal Support: The ability to work with images, PDFs, and sketches sets it apart from text-only alternatives.
MCP Integration: The extensibility through MCP servers provides a path for custom integrations.
Next Steps #
I’m finding Gemini CLI’s approach quite interesting - the large context window and multimodal capabilities are genuinely useful for complex development tasks. It feels less like a chat interface and more like a proper development tool.
I’ll continue testing it alongside Claude Code and OpenAI Codex CLI to see how it performs in daily development work. If it proves useful enough, I’ll follow up with tips and tricks posts like I did with Claude Code, covering areas like MCP server integration and making the most of that context window.
Have you tried Gemini CLI yet? I’d love to hear about your experiences in the comments below.